June 3, 2012

Go West Young Man, Part II

Memorial Day weekend was our time to actually start building the treehouse.  We had collected more lumber and pre-cut most of it so the job on site wouldn't be as difficult.  This of course meant we needed to transport all of it including some plywood we got for cheap on Craigslist.

I didn't want to use a trailer again if I could help it so I looked to using roof racks.  I also didn't want to spend money on commercial roof racks (around $300), so I decided to use some of the studs and rafters that I was going to use on the tree house as the roof racks.  Here is what I did:

I first used 5 studs that are going to be used on the shorter wall as the cross members.  I lashed each one to the existing roof racks that came with the van.


I then used what will become the roof rafters as the members that are going front to back.  I used deck screws to attach all the wood.


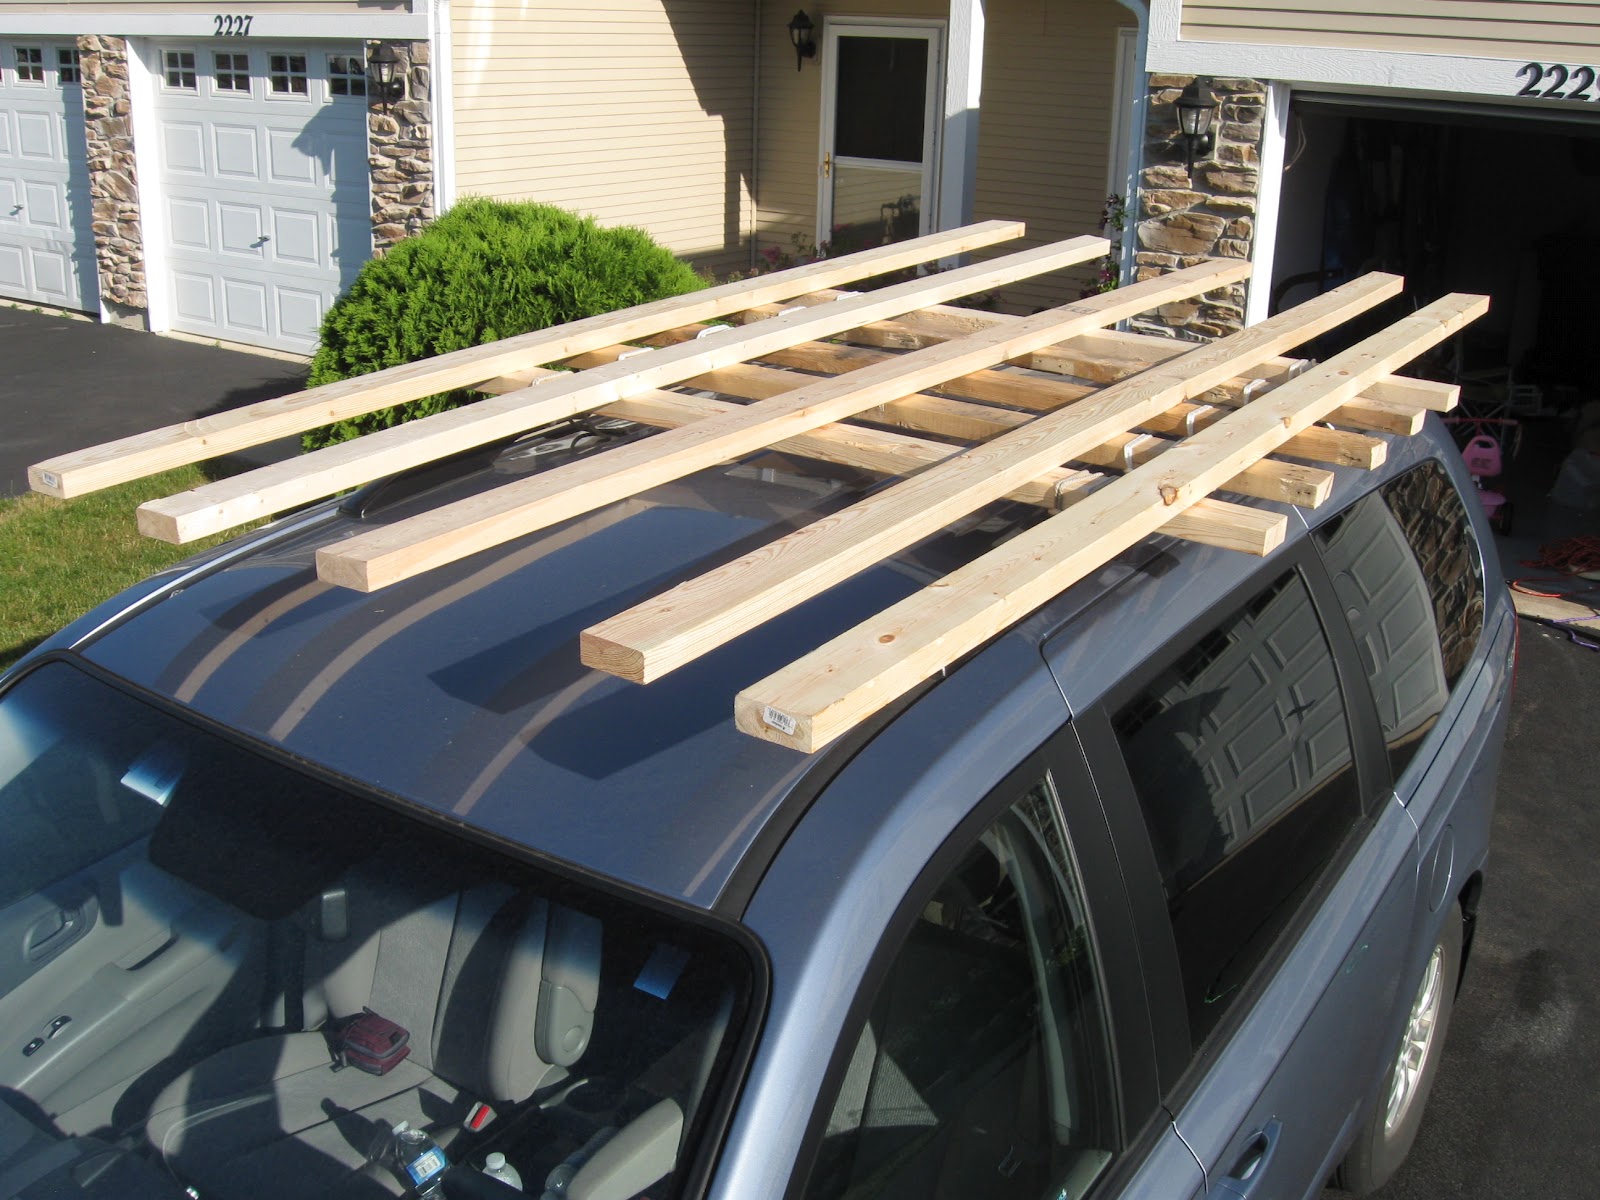
I spaced them about 11.5 inches apart so later in the day when we got the 2x12 beams, they will nestle down in.  Next came the plywood and a bunch of trucker's hitches back and forth, back and forth...


I added a few boards front, back and on the sides so the plywood didn't shift  It worked like a charm.

Of course the inside of the van was stacked to the gills too.  Here is the van with all the lumber, supplies and tools ... and we haven't even packed our clothes and food yet!


After we packed up all the supplies, I took this next picture.  Try and find where my 9 year old, Mia, is supposed to sit.


So once the Swagger Wagon was all loaded up it was a little low on the suspension, but not too bad.  Here we are ready to leave.


And after a 5 hour trip with minimal mishaps, we arrived at "the hut".


It is similar to our arrival last fall, isn't it?  Always bringing new supplies...

May 18, 2012

Let's Build Something: Windows

Budget has been a big part of this tree house being practical.  I know that I want windows in this thing for a couple of reasons: I don't want this to feel like a cave and I would like a cross breeze.  I have looked into buying windows, but the cheapest new window is about $50 at Menards and used windows on Craigslist are about the same price.  This means I should make them from scratch.

I made a couple that I think came out pretty nice.  They ended up costing about $25 each, but it is still worth it.  I also got that cool feeling of accomplishment.  I am going to outline the steps I took to make them after the jump.

May 6, 2012

Let's Build Something: Beam Supports

I knew that eventually I would need to build supports that would go underneath the main beams for the smaller tree since that is the side that the beams will be allowed to slide.  The more I thought about it, the more I liked the idea of having 4 of these supports, 1 for each side of each tree, so that I can have more anchor bolts into the trees but also have the anchor bolts spaced apart.

The design of the beam supports are actually quite simple, I just ripped off the Romans and built 4 crucifixion crosses.  I guess you could call them telephone poles too, but you get the idea.  I first cut an 8 foot 2x6 in half.  One 4 foot part will be the vertical part and one 4 foot part will be the horizontal.  For the diagonal parts, I marked and cut 45 degree angles for that the longest part of the remaining board is 2 feet long.  Here is a picture showing my layout for the diagonal members:


Once the diagonal member are cut, I cut 1.5 inches off tone of the corners to give a nice shoulder.  You will see why in a moment.

Now I want to cut a groove on the horizontal member for the diagonal members to mate to.  I trace the outline of the top 1.5 inches of the diagonal members onto the horizontal member and then cur relief cuts for easier material removal once I break out the chisel.  Here are 2 pictures showing the tracing and then the relief cuts right before I chisel out the material.


With that completed, you start to get a glimpse of the finished product.


Lastly, I add the vertical member underneath and drill all the holes for the 1/2 inch carriage bolts.  With that assembled, here is the finished product:


I did not complete the assembly because I want to break this down for easier transport.  When it is in its final-final assemble stage, there will be truss plates nailed at the junctions between the horizontal and diagonal members to hold them in place.

Of course all this could not be possible without my family of helpers.  Today, Anna really was a really big helper.


April 18, 2012

Designing - Beam, Joist, Floor and Stud Plans

I have been planning, drawing, erasing, redrawing and planning some more all Winter.  I am trying to figure out the optimal design of the tree house with the lumber that I already have so I do not have to buy too much.  I think I have a pretty good idea of how this is going to look.

The first plan is the Beam Plan, which is technically the foundation of the whole structure since everything sits on top of it.  I am going to use two 2x12 boards parallel to each other.  I am going to add cross members as room permits to act as stiffeners so this becomes more of a box beam (per the suggestion of the eternal engineer - my Dad).

Here is the plan as I currently have it drawn.


March 14, 2012

Back in the Saddle Again

I know it has been a few months since posting anything, but the Winter was a time to take a break and reflect.  Now we are back and planning again and with that is more Craigslist searching.  We found another good buy, 20 2x4s (untreated) and 4 4x8 sheets of plywood. 


The 2x4s will work great for the wall framing.  The plywood will work great for the flooring inside the treehouse.  I was thinking of doing decking throughout out the platform, but I cannot pass up an opportunity like this.

It was $15 for all of this.  It's like a broke dick: you can't beat it.